This article summarizes a paper by W. Mohr and N. Kapustka, EWI, entitled, “Fatigue of GMAW-P Lap Joints in Advanced High-Strength Steels.”M-13
EWI has performed fatigue tests on welds from four Advanced High-Strength Steels (AHSS) in the uncoated condition. The materials were provided in three thicknesses as follows, 2.0-mm DP 780, 1.8-mm 590 SF, 2.0-mm DP 980, and 2.8-mm CP 800. Referring to Figure 1(a), welding parameters were selected to meet the weld profile requirements listed below:
The travel speed to achieve such combinations was 23 mm/s for three of the sheets and 13 mm/s for the 2.8-mm-thick CP 800. Figure 1 shows a completed panel.
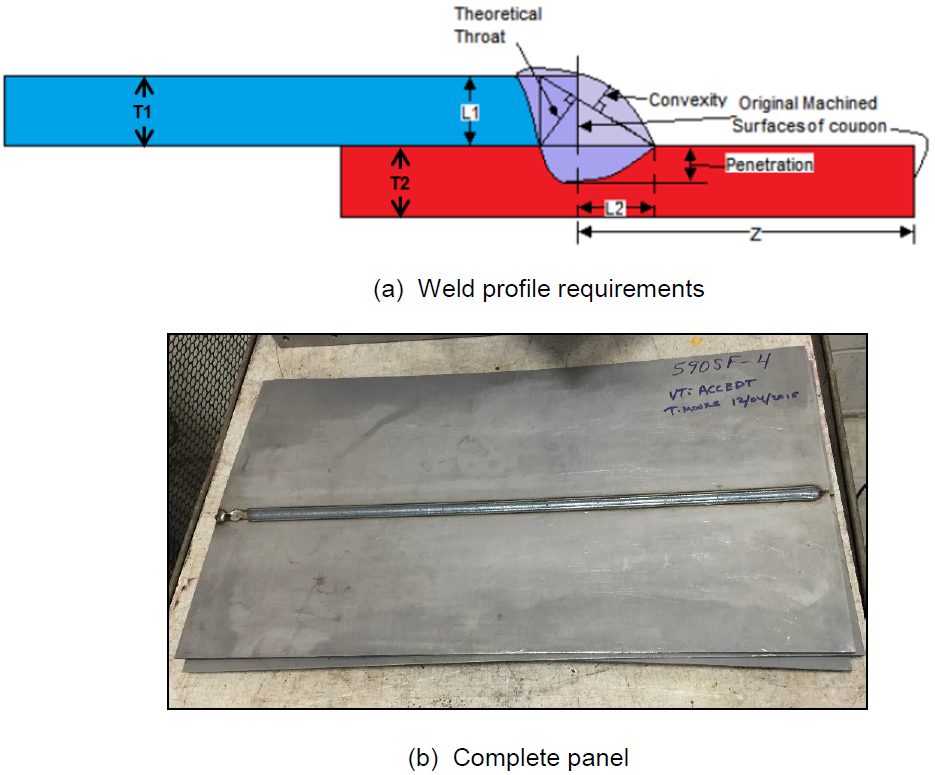
Figure 1: Completed Panel.M-13
Specimens were cut from the lap-welded panels in a configuration recommended by Z 2275, with minimum reduced sections of 20-mm wide, with 20-mm radii on both sides to a full width of 30 mm, as shown in Figure 2.
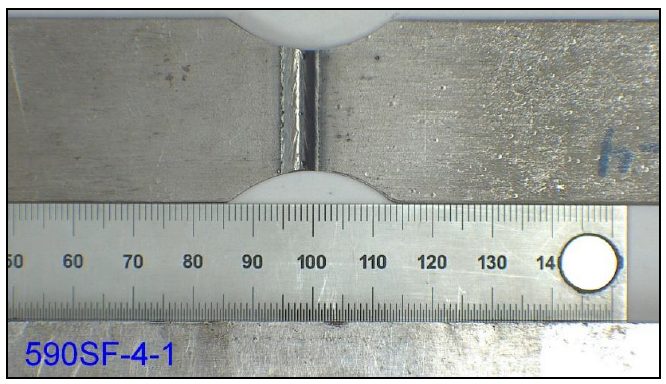
Figure 2: Specimen Design.M-13
Fixtures for the bend testing had eight, 6.3-mm radius rollers, four on top and four on the bottom, with offsets of the roller centers to accommodate the lap-joint configuration and the differing sheet thicknesses. The interior span was 120 mm, while the exterior span was 210 mm. The full bending fixture, with a specimen inserted, is shown in Figure 3.
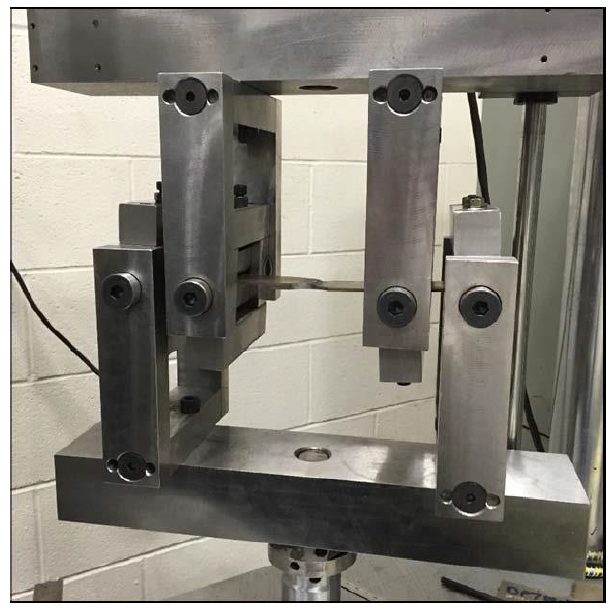
Figure 3: Bending Test Fixture.M-13
Weld profiles were achieved that met the weld profile requirements for each sheet material type. These weld profiles are shown for the four sheet materials in Figure 4. Fatigue testing results in tension at R = 0.3 gave lifetimes between 30,000 and 9 million cycles, with run-outs at 10 million cycles, as shown in Figure 5.
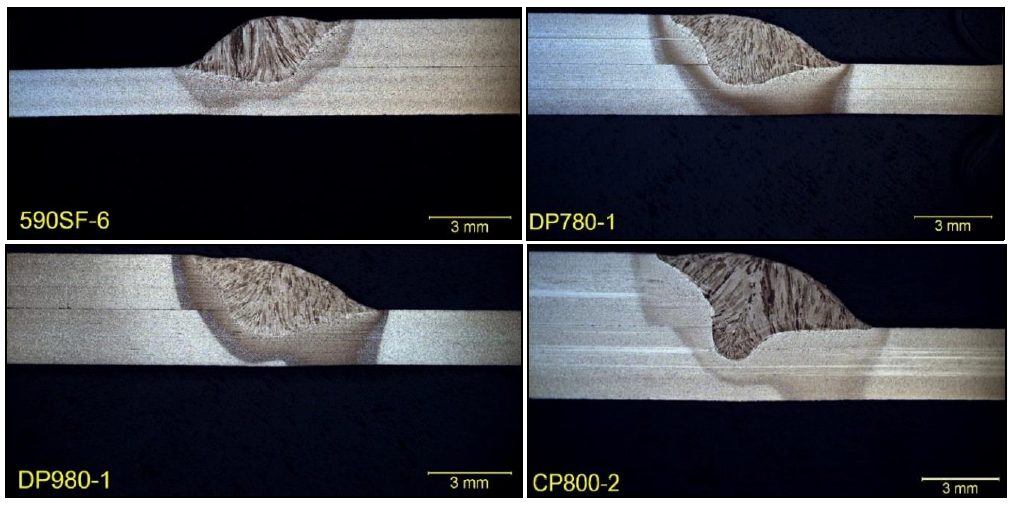
Figure 4: Cross Sections of Lap Joints (etched with 2% Nital).M-13
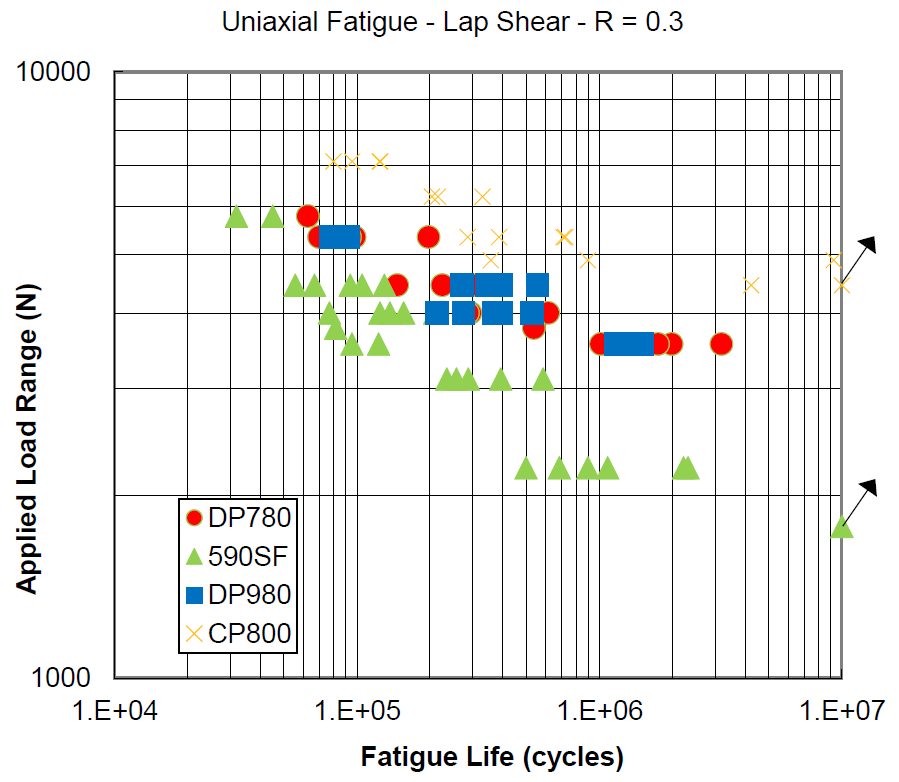
Figure 5: Results of Fatigue Testing in Tension at R= 0.3.M-13
Weld root cracking dominated in the 590 SF, as well as the DP 780 and DP 980, with an example shown in Figure 6. Weld toe cracking was observed on the 2.8-mm-thick CP 800, with an example shown in Figure 7.
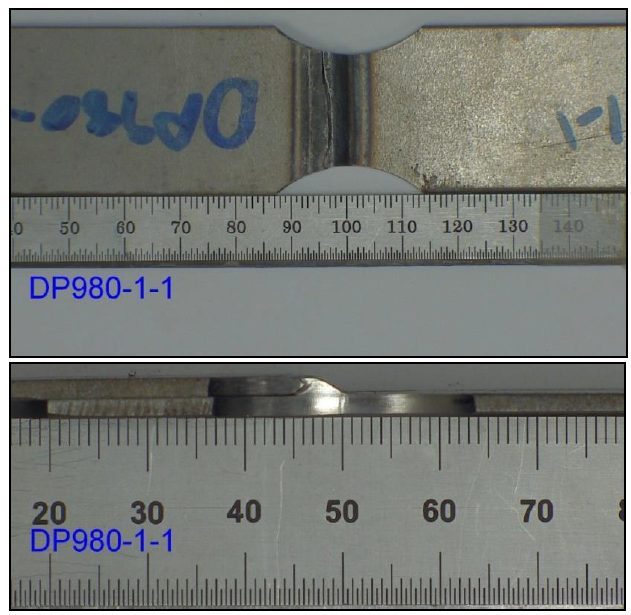
Figure 6: Example for a Root Crack Breaking Through the Weld Metal on DP 980.M-13
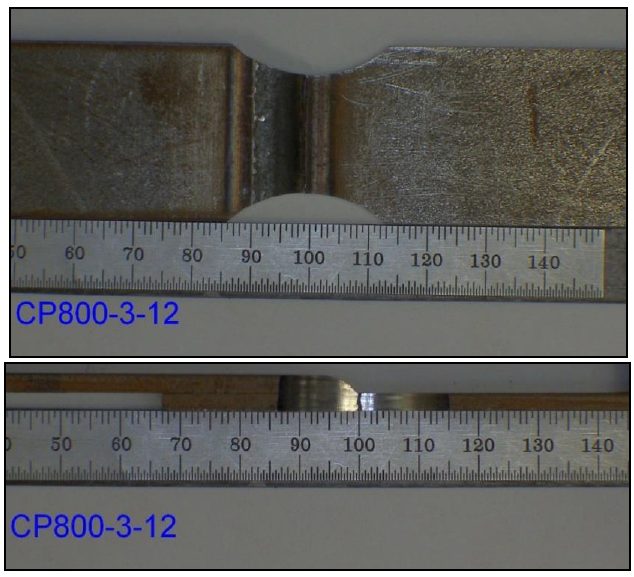
Figure 7: Example of a Toe Crack Breaking Through the Base Metal.M-13
Fatigue testing in bending at R = -1 gave lifetimes between 30,000 and 2 million cycles, with run-outs on tests that continued to up to 7 million cycles, as shown in Figure 8.
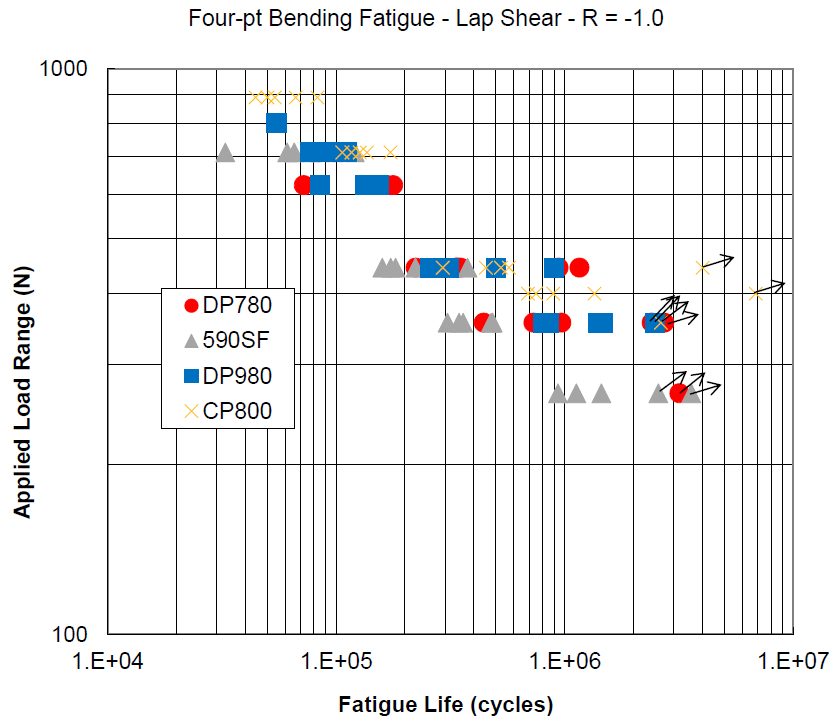
Figure 8: Four-Point Bending Tests at R = -1.M-13
Taking the differing thicknesses, minor variations in minimum width, and the stress concentrations from the radii into account, the concentrated stress range was calculated to compare the four materials on a common basis, as shown in Figure 9.
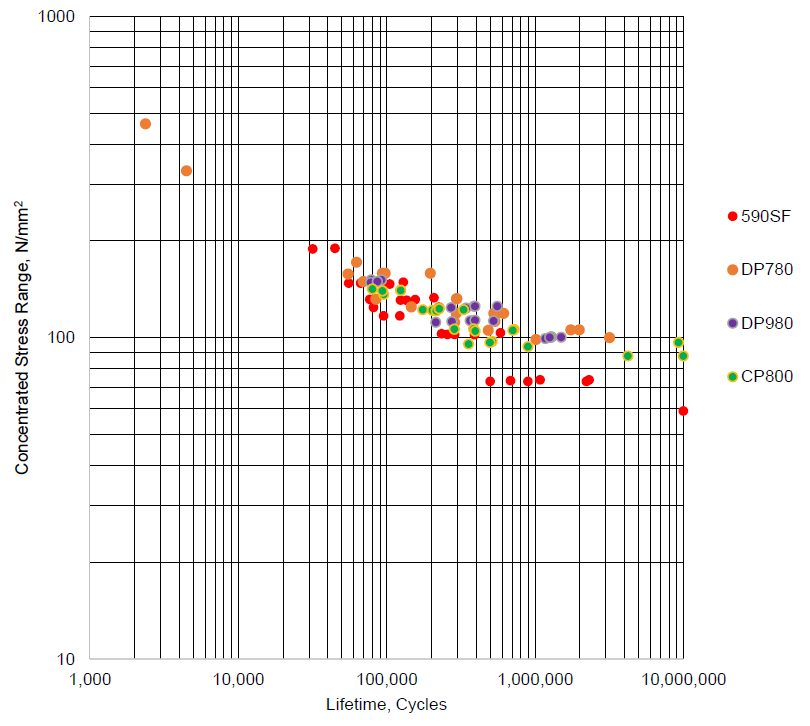
Figure 9: Concentrated Stress Range versus Lifetime for Tension Tests.M-13
The fatigue cracks initiated at the root for the 1.8-mm 590 SF on both tension and bending testing. The fatigue cracks initiated at the weld toe for the 2.8-mm CP 800 on both tension and bending testing. The fatigue cracks initiated from the weld root in the tension testing and from primarily the weld cap in bending testing, for the 2.0-mm-thick DP 780 and 2.0-mm-thick DP 980.